- Home
- Incubation day by day
- Day 1
Chicken egg incubation, day 1.
When does development start, how long does incubation take, what's going on in the egg on day 1 and what should we be doing?
So you've thought it all through, bought the equipment, found your eggs and allowed them to 'rest' while you bring your incubator up to the right temperature, and at last you've set them into the incubator.
Now it's time to see what's happening at this very early stage of chicken egg incubation.
When exactly does day 1 of chicken egg incubation begin?
This can be confusing.
As a rough guide, if the eggs go into the incubator in the early morning, that counts as day 1.
However, if they go in any time after mid-day, that's day 0 and the following day as day 1. So if you put your eggs in on a Monday at 5pm, Tuesday is day 1.
An egg doesn't have a full day's development until it's been incubated for 24 hours.
Incubation times aren't all that precise, though, so don't get too worried about it.
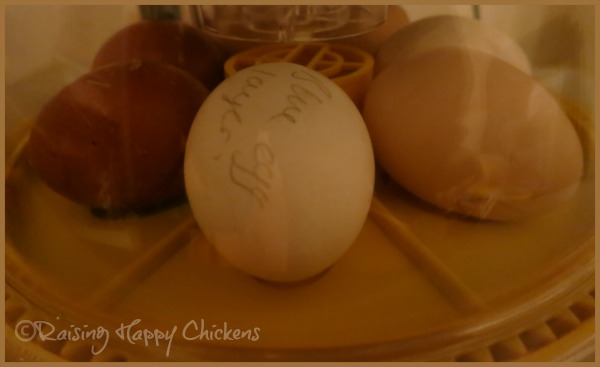 A clutch of eggs at day 0 in my Brinsea Mini Advance incubator.
How long does the process of chicken egg incubation take?
The process from the start of incubation to hatch usually takes 21 days. However, as we'll see later in the process, this is not an exact science. Hatches can take more or less time than this, partly depending on the breed.
Bantam chicks hatch as early as day 18 or 19, while I've had large breeds hatch as late as Day 26. Nature will take its course – chicks will hatch when they're ready.
What's going on in the egg today?
You might think nothing much is happening in the egg today. After all, it's only just gone into the incubator.
You couldn't be more wrong.
In fact, the egg starts to develop as soon as it's laid – provided, of course, that a cockerel (rooster) has been around to fertilise it. If there's no daddy, there's no baby.
As soon as the fertile egg is laid, cells begin to divide and will, if kept at the right temperature and humidity levels, start to develop today into an embryo.
If they're not warmed then nothing will happen.
In a fertile egg which isn't incubated, the cluster of cells remains. If you open it at this point and look at the yolk, you'll see a pale circle with another, smaller circle in the middle.
This is the blastoderm, often referred to as the "bullseye". It looks a bit like a doughnut. It's a sign that the egg is fertile, and it's from here the chick will develop.
In an infertile egg it's called the blastodisc and doesn't have the same 'bullseye' or doughnut pattern: you'll just see a faint, pale circle.
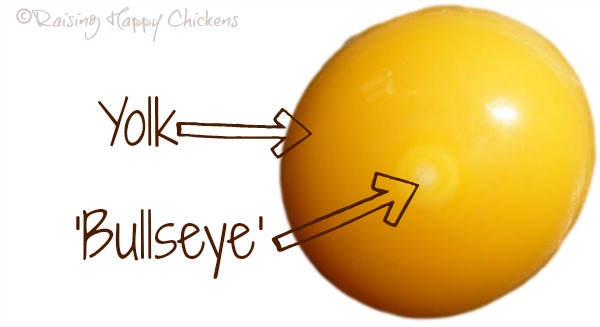 The 'bullseye' or doughnut of a fertile egg.
What does the chick look like on day 1 of incubation?
At this stage it's really not a chick, just a collection of cells. Although cells are dividing, the development is not visible to the naked eye.
What's happening to the chick?
Despite this, the blastoderm – that collection of cells which will form the embryo – is developing, microscopically.
The cells which will
become the head, spine, blood vessels, nervous system and digestive
system are already starting to divide.
Please note: the image below is a commissioned piece and is subject to international copyright laws. I am the sole copyright owner.
It must not be used, copied or reproduced anywhere without my permission.
Contact me for details and permissions for this and all other images on this page.
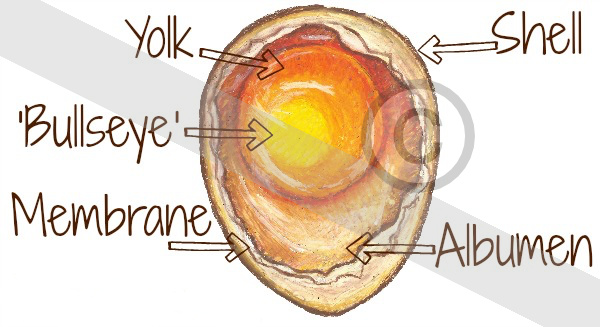 The incubated egg at day 1. Do not copy or use without permission.
What can we see if we candle the egg at day 1?
Nothing.
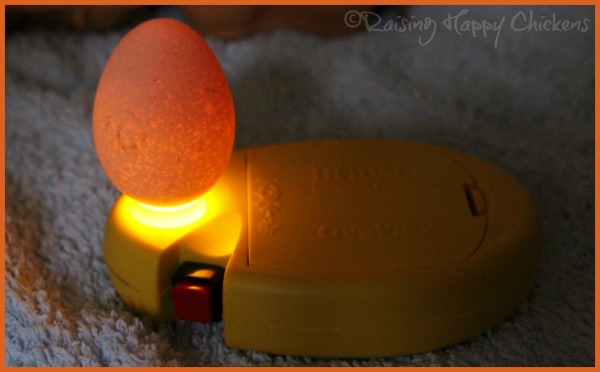
It's not wise to candle too early in the chicken egg incubation process. There's nothing to see yet and you run the risk of damaging the fragile embryonic system.
This is what you'd see if you did. The slightly darker area on top is the yolk. Apart from that, the naked eye can't see anything – and won't, until around day 4 or 5.
What should we be doing on day 1?
1. Egg position is critical.
Make absolutely sure the eggs are either lying on their side or are incubated with the pointed end facing downwards and the blunt end up.
This is really, really important.
If the eggs are stored the other way, with the pointed end uppermost, the eggs will not hatch. No ifs or buts – it simply won't happen.
I have had so many people write to me in desperation having realised later on in incubation that their eggs were wrongly placed and, sadly, the whole hatch has been a failure.
2. Temperature and humidity for hatching chicken eggs successfully.
Make sure the incubator's temperature and humidity levels are set correctly.
These levels will remain the same until Day 18 of incubation when the incubator is locked down.
- Temperature should be 37.5ºC (between 99º and 99.5ºF) in a forced air incubator.
- Humidity should be maintained at 45%.
3. Turning the incubated eggs.
Make sure the eggs are turned consistently.
It's also important to make sure that every egg is turned throughout incubation right up
until day 18, and it's particularly critical in this first week. It's
been shown that turning increases the success of a hatch by
as much as 80%.
Why does this matter?
Early in the process there's a strong
possibility that not turning will cause the developing embryo to stick to the shell membrane
and be unable to grow.
Later in development a chick may start to 'pip' but die at that point, because not turning also affects the air cell which doesn't develop properly.
So the chick itself develops but when it tries to 'pip' through the inner membrane, there's no air there for it to breathe.
In effect, it suffocates.
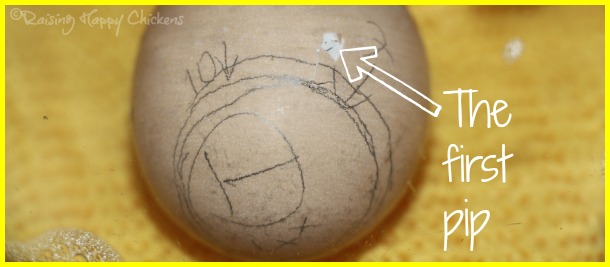 The hatchling will only pip if the air sack is properly developed.
How often should turning take place during incubation?
A hen sitting on eggs gets off them every day until around the end of day 18. She goes to get food and drink, and when she returns to the nest she moves the eggs.
Incubators with automatic turning devices mimic that behaviour and turn by a small degree every hour or two, day and night.
See this page about how to set the Brinsea Mini Advance for more
information.
If you're turning your eggs by hand it needs to be
done at the very least four times a day.
If you're a teacher and your eggs are in the classroom, you need to be sure before you begin incubating that you can have access to the school at weekends. Chicks do not stop developing on a Friday night!
I don't have an automatic turner – what should I do?
Mark each egg on both sides (before I had an automatic turner I used an 'X' on one side and 'O' on the other) and turn them halfway round each time.
Don't turn them completely around all in one go – there's a danger that you'll break the chalazae which holds the yolk in place.
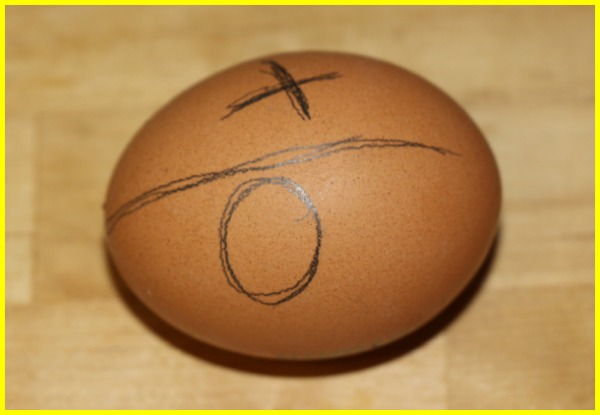 If you have to turn the eggs manually, mark them so you know which way they should be.
If you're turning manually it probably won't be possible for you to turn every hour for 24 hours. Do it as often as you can but at the very least, four times a day.
And remember: you need to turn them at weekends too!
This is such an important requirement of chicken egg incubation that I would advise you to set some kind of alarm to remind you it's time to turn.
Can anything go wrong at this stage of chicken egg incubation?
No-one can tell at this point whether or not an egg is fertile, so it's not exactly 'going wrong', but in any hatch a proportion of the eggs won't even start to develop because they haven't been fertilised.
Reputable breeders who sell eggs test a proportion of the clutches and will have a reasonable idea if there's a good level of fertility in general. But nothing can be guaranteed. Some hatcheries will offer to replace eggs which have never started to develop.
The best anyone can do is to make sure the eggs you choose for hatching are the best available.
If you haven't seen it, my page about choosing fertile eggs will tell you what to look for.
How to incubate chicken eggs: question of the Day.
Can I eat a fertile egg?
People often ask if an egg which has been fertilised is safe to eat and the answer is – absolutely. It doesn't have any more health benefits than an unfertilised egg, though. That's an 'urban myth'.
Looking for a good book about incubation?
I can't recommend Gail Damerow's "Hatching and Brooding Your Own Chicks" highly enough. It's become my incubation "bible", and I guarantee it will be yours, too!
I have a detailed review, covering what's in the book, how to use it, why the "screwpot notions" section is specially good fun, and where to buy it.
Other pages you may find helpful.
Preparation of both the equipment and the fertile hatching eggs can mean the difference between a successful and an unsuccessful hatch.
Click on any of these pictures for
more information.
Sources.
A lot of "facts" you'll find on the internet are often people's individual views, based on inaccurate information repeated from poor quality sources.
The information I provide in this article and others is based not just on my own experience, but on evidenced facts from scientific, peer-reviewed research and books from highly respected and experienced poultry keepers such as Gail Damerow.
Some of the trusted sources I have used in this article are these.
Damerow, Gail: Hatching and Brooding Your Own Chicks. Pub. Storey, 2013. See my review, here.
Hamburger, V and Hamilton, H L: A series of normal stages in the development of the chick embryo'. Pub. Journal of Morphology, 1951.
Kellicott, W. E.: Outlines of Chordate Development, Pub.1913.
Lee, B. R. et al: 'A set of stage-specific gene transcripts identified in EK stage X and HH stage 3 chick embryos'. Pub. BMC Developmental Biology, 2007.
- Home
- Incubation day by day
- Day 1
