- Home
- Incubating: short course
- Days 14 - 19
Hatching chicks: the third week of incubation, days 14 - 19.
Nearly there - just a week to go before hatching starts.
This stage of egg incubation is both exciting and frustrating.
In candling, you'll be able to see your developing chick moving. Soon after that, you'll be able to see very little.
As the chick grows and starts to fill more of the egg, candling becomes more difficult - the chick's body simply gets in the way.
The candling pictures I use here and in my other hatching chicks series are my own and follow one of my eggs right through from the start of incubation to hatching - and beyond.
Here's Buffy, the baby chick who hatched from the egg you're about to see, when she was just ten days old.
Notice how her tail and leg feathers have started to develop.
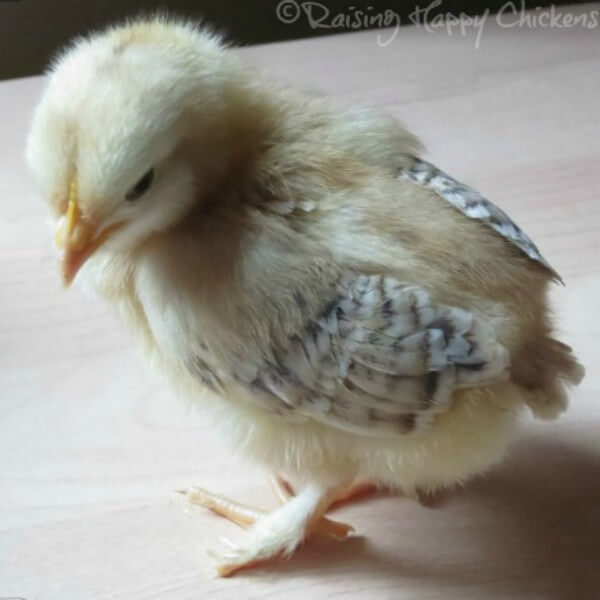 At ten days, the wing feathers are developing and the chick is trying her flying skills!
Want more detailed information about incubation and hatching?
My hatching series, available only to members of my Hatching Club, takes you step-by-step, day-by-day, all the way through the process of incubating and hatching your own chicks.
From the very first steps of deciding whether keeping chickens is a good thing for you to do, to choosing the right eggs, how to candle for best results, the specifics of what to look out for during each incubation day and finally the highs (and lows) of hatching itself.
For more information, see this page.
Incubation, days 14 to 19: from candling to lockdown!
Six days, massive growth.
This stage of incubation sees the embryo developing all her organs ready for hatching. Here's how she would look if you could see inside the egg during this period.
 Image courtesy of Researchgate under Creative Commons licence.
Exactly what's happening inside the egg?
- The start of this stage sees the embryo developing almost all the down it will be born with - the classic fluffy covering you'll see in your own hatchlings.
- On days 14 and 15 the chick's skull, beak, claws and scales on the legs all begin to become much firmer and the 'egg tooth', which will be used to break out of the shell, hardens.
- To help it develop properly, the allantois provides a means of calcium being brought from the shell to the embryo - hence the importance of making sure the eggs you incubate are from healthy chickens and have strong, non-porous shells.
The image below is what the embryo would look like if you could see inside the egg now.
- The amnion is the sac which contains the embryo and protects it until hatching.
- The allantois, which as well as providing an exchange of calcium and oxygen also gets rid of waste, will start to become very active within the next twenty-four hours.
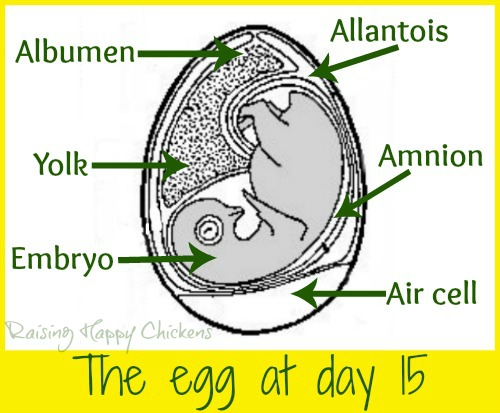
- The air cell is growing to provide enough air to keep the hatchling alive, and the egg white is becoming smaller. The embryo is now filling most of the egg cavity.
- On days 16 and 17 the embryo begins to move itself into position for hatching, tucking its head under its right wing with the beak pointing towards the air cell. The renal system begins to produce waste - you'll probably be able to see the remains of this left behind in the egg shell after hatching.
- Day 18, and the process of the embryo absorbing the yolk of the egg into its stomach begins. This makes it possible for hatching chicks to survive for up to 48 hours without food or water after it's hatched - they live off the yolk.
- By day 19 the process of the embryo absorbing the yolk is speeding up. The chick now fills most of the egg and is ready to start hatching.
- Throughout this stage the chick starts to manoeuvre itself into position for hatching. The egg tooth is moving towards the position it needs to be in to start breaking through the membrane and shell during the final stage of hatch.
This is quite an active time and, if you're lucky, you'll be able to see
some movement when you candle the egg.
These two processes of yolk absorption and the beak turning towards the air sac are vitally important. If either one of them is disturbed there can be fatal consequences.
It's for that reason that most people favour leaving the egg unturned and not candled after day 18.
At the end of this stage, the chick is ready to begin the process of hatching.
What does candling show us during this stage?
Day 15.
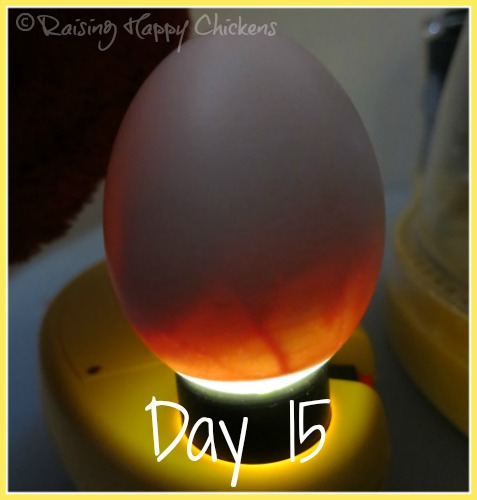
You can see here how the embryo is now filling a large part of the egg.
Candling at this point provides a view of the vein - just above the air cell - moving quite energetically as the chick positions itself for hatching. Compare this view with the diagram here.
Day 16.

The embryo is now so big that the top part of the egg looks completely dark and only a few veins are visible at the air cell end.
Day 17.
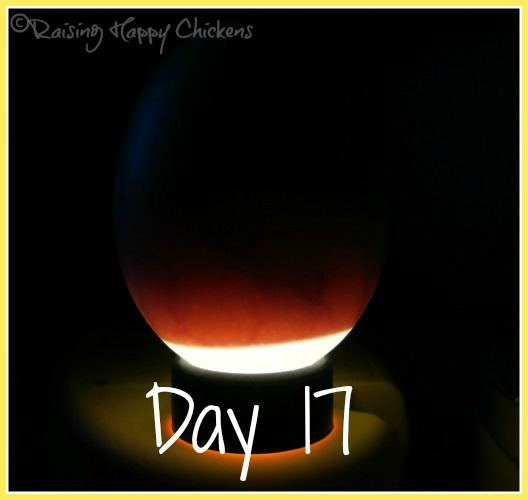
Only twenty-four hours later, even less can be seen. The chick is now filling all but the very extreme end of the egg.
Day 18.

This picture shows the air cell very clearly but not much else. The air cell by now has grown enough to allow the hatching chick to take its first breath there. The chick is filling the entire rest of the egg.
Day 19.

There are no further candling photographs after
this point because the eggs need to be left alone so the chicks can
properly position themselves for hatching. They will remain untouched in the incubator until the chicks are hatched and dried.
Just two more days left! Excited? I always am!
From now on, we'll leave the chick to her own devices as she continues to develop and to turn the right way to be able to hatch successfully.
There's not much more we can do for our eggs at this point - but there's a lot we can do to prepare for our chicks once they've arrived!
Are you prepared? If not, take a look at some of my articles about caring for chicks in those first important days after hatch.
More about incubating, and caring for newly-hatched chicks.
- Home
- Incubating: short course
- Days 14 - 19
