- Home
- Incubating: short course
- Days 1-7
Incubating and hatching chicken eggs: your guide to a stress free days 1 - 7.
So you want to incubate and hatch but you're not sure what to expect?
In this and the following pages I take you through the different stages of incubating and hatching chicken eggs, from day 1 to hatching at day 21.
We'll go step-by-step, slowly, carefully and with as much practical detail as you can take.
This series is expanded in my free email course and my more detailed Hatching Club course.
In both of those, I guide you in increasing detail through the process.
My email course is free to my Chicken Digest group only. Find more details, and sign up, here.
If this is your first time incubating chicken eggs...
...and if – as I'm sure you do – you take it seriously, you can expect to feel two things: uncertain, and anxious. I certainly felt like that. It's only natural.
You've read all the books, you've seen all the questions on the forums. So much can go wrong at any stage...
But if you can, try to relax and enjoy the whole process.
A mother hen goes through this without too much fuss. We'll use her as our role model as we go through the process.
Of course, things can go wrong. But if you've chosen and stored your fertile eggs wisely, if you're careful and you don't panic, all will be well.
Healthy chicks.
The candling pictures I use here and on other incubating and hatching pages are my own. They follow one of my chicks right through from placing the egg in the incubator to hatching.
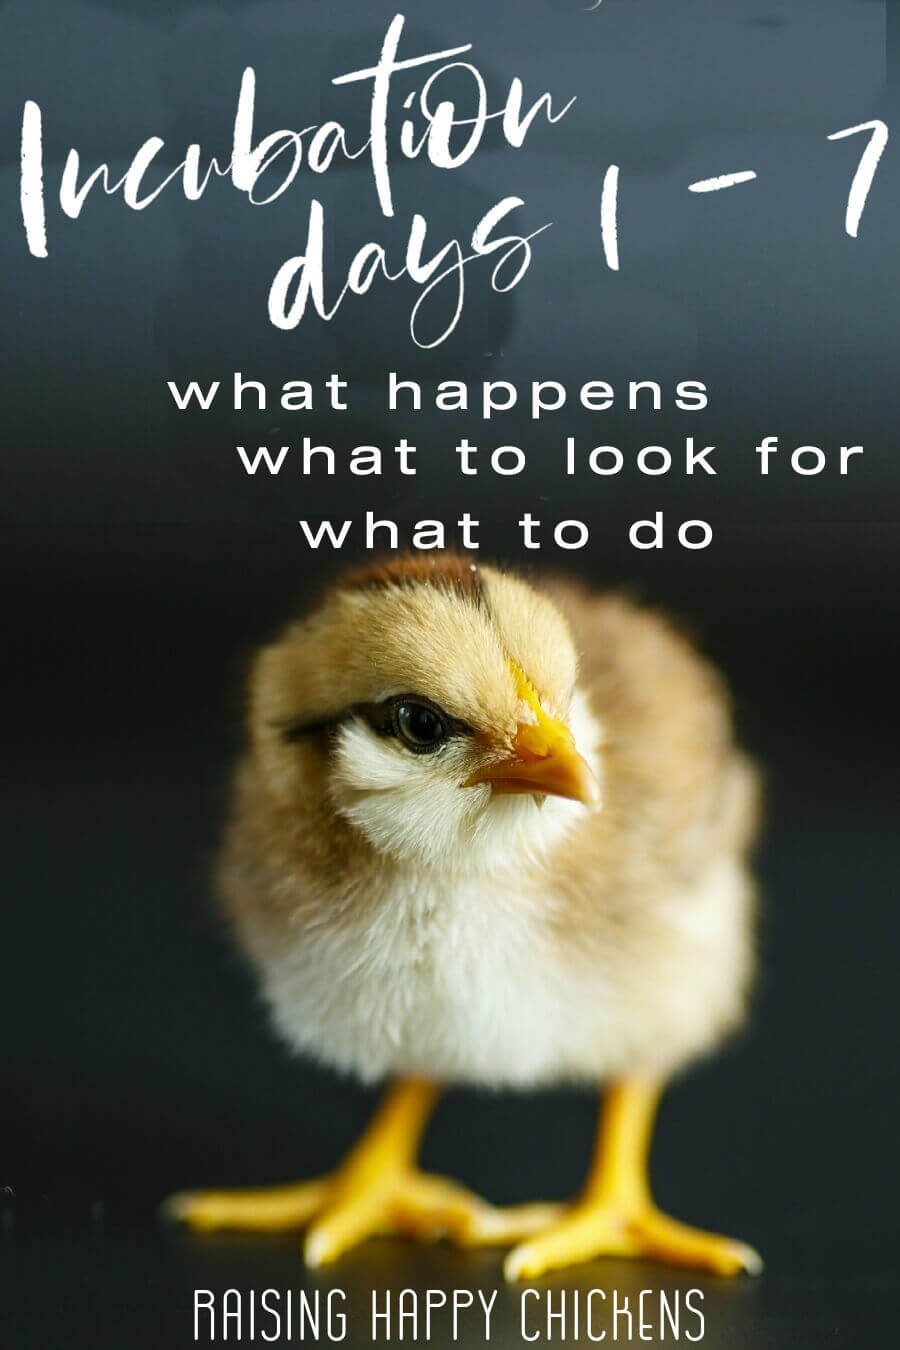
This is what she looked like just a few hours
after she'd hatched.
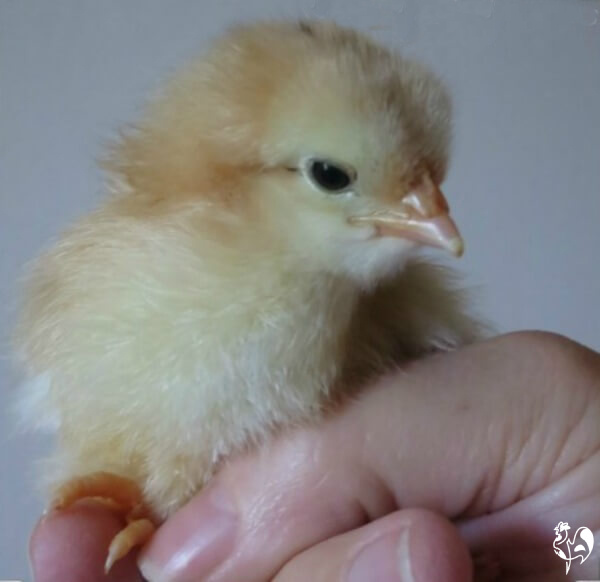
See the white tip on the end of her beak? That's the 'egg tooth' which chicks use to peck their way out of the egg. She'll lose it within a day or two.
Hatching chicken eggs, days 1 to 7: what's going on inside?
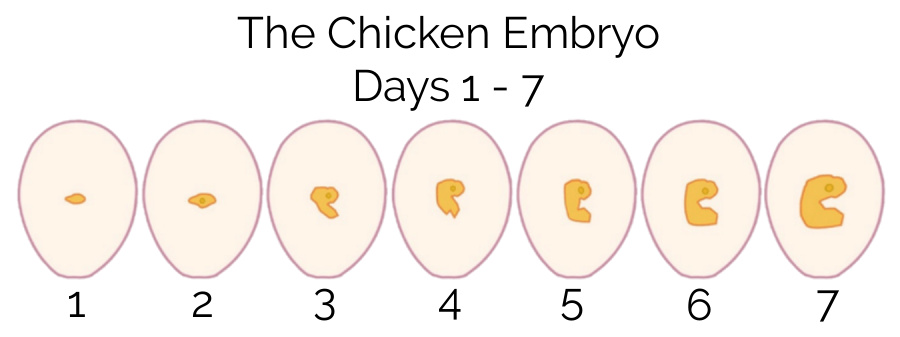 Image courtesy of Researchgate under Creative Commons Licence.
The answer is – quite a lot. It may not seem like it, and you won't be able to see much of the embryo's development, at least initially. But ever since the egg was laid, it has been developing.
It will have stalled once the hen was no longer warming it. But make no mistake: if you have a fertile egg, development has already started before the egg goes into the incubator. Incubation kick-starts the process again.
- Days 1 and 2 of incubation see the start of growth for everything of huge importance to the embryo.
- The head, ears, eyes, spinal column, nervous system (including the brain) and heart begin to develop.
- As early as 72 hours after the start of the process, tail, wing and leg buds appear and the heart begins to beat.
- By day 4 the toes and tongue have begun to form (chickens may not have teeth but they do have a tongue!) and on days 5 and 6 the crop, reproductive organs and beak start forming. Finally, the wing can now bend.
- By day 5, you may be able to see the chick developing when you candle the egg.
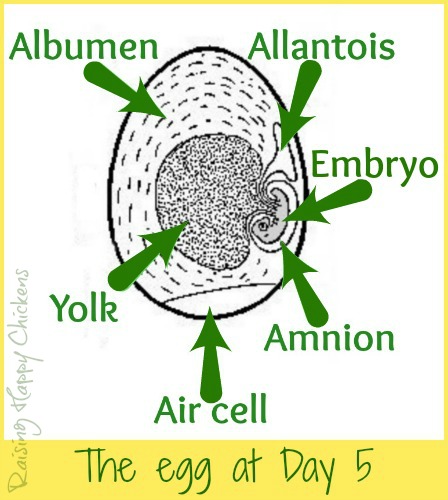
- The allantois is part of what in a human embryo we would call the umbilical cord. It is responsible for getting rid of waste as the chick grows.
- You'll quite often see be able to see it left behind in the shell after the chick has hatched.
- The amnion, also called the amniotic sac, is a membrane which surrounds and protects the embryo during its development.
- On day 7, the leg is able to bend and a ridge of 'papilla' or glands form. This is where the feathers will appear on the tail and thigh.
By the end of this first week, your chick is one third of the way to full development.
What can you see inside the hatching chicken eggs on days 1 to 7?
The shell of the egg doesn't change at all on the outside until the chick is ready to hatch much later in the process. At that point, she will start to peck through. This is known as "pipping".
Until then, if you want to see anything you'll need to invest in a candler. A candler can be either home made or shop bought. Both are good as long as the light is very bright, and focused.
Hatching chicken eggs: days 1, 2 and 3.
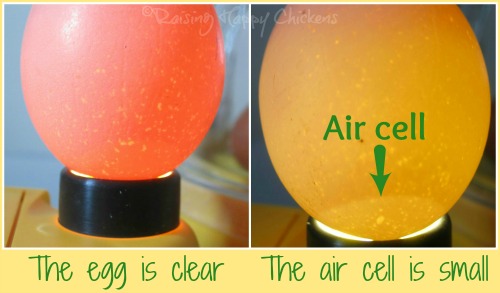
There's really not much to see at this point. Initially the egg will look clear, apart from the air cell which you may be able see at the 'fat' end of the egg – but probably not before day 4 or 5.
As time goes by you'll notice this air sack become larger. It's here that the chick will eventually hatch.
In these early days, you'll probably be able to see the yolk as a darker "shadow" inside the egg. When I first saw this, I was hugely excited: I thought it was the embryo.
That's how much I knew!
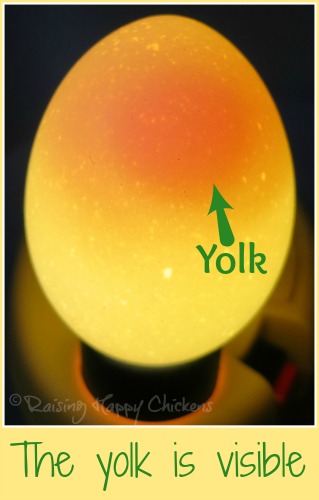 The egg, candled at day 2.
Incubating, days 4 and 5.
If you're fortunate enough to have light-shelled eggs, from about day 5 you'll start to see tiny spider like markings appearing in the yolk area when you candle your eggs.
In a dark-coloured egg like the Marans or Welsummer, they're much more difficult to spot.
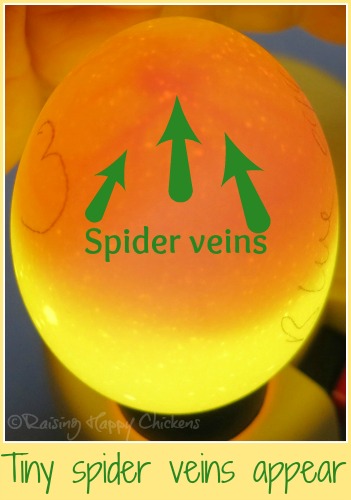
This is the start of the embryo's visible development. The 'spider legs' you can see are blood vessels. They will become much more well-defined over the next several days.
Incubating, days 6 and 7.
The next few days see the development of the blood supply to the developing embryo, and the eye becomes far more prominent.
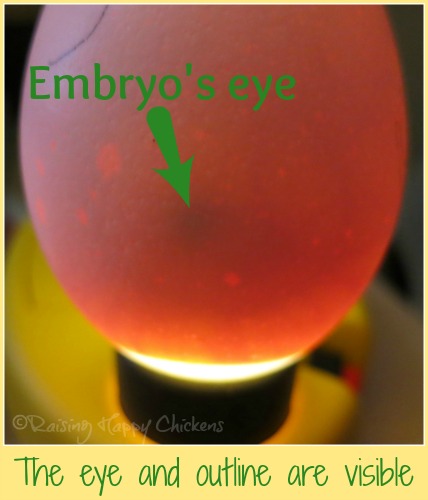
If you look closely, you can see the outline of the embryo developing. It looks like a darkish ring around the eye.
Also notice at the bottom of this picture that the air cell has started to get a little larger. This too will become more obvious with time.
So that's it - you did it! You got through days 1 to 7 of the process of incubating and hatching chicken eggs. Congratulations!
In a lot of ways, the first week is the worst. Once it's over and you know the chick has started to develop, you can see your chick developing. You'll also be able to tell whether you have eggs which are infertile and not going to develop.
Next week, we'll watch as the chick develops even more, make sure we're keeping the right conditions in the incubator, and learn what to do with eggs that are just not developing.
Join my Hatching Club for a more detailed view of the incubation process.
Sadly, the Hatching Club is not available as at the start of 2023 due to bird flu and the lack of hatching eggs. Check back later in the year for an update.
If you've enjoyed the information on this page, you may be interested in my detailed hatching course.
It takes you step-by-step all the way through the process of hatching your own chicks. It starts at the very first steps of deciding whether keeping chickens is a good thing for you to do, to choosing the right eggs and setting up the incubator.
It goes into much greater detail about candling and what to look out for during each incubation day. It will also steer you through the highs (and lows) of hatching itself.
Click here or on the pic for more details and to sign up for my course.
More incubating and hatching information.
- Home
- Incubating: short course
- Days 1-7
